The scale and speed of adoption have been incredible, and Uber cites its unique business model and experience as the drivers.
So what are the most significant issues customers have with Uber? And how has Uber used science to fix them?
Uber customers’ biggest pain point — the wait
Imagine you’re out at 2 am on a winter night, waiting for your Uber while shivering on the side of a dark street in a new town. Or you’re late for an important meeting that you might just make if your Uber is on time.
In these high-pressure situations, your perception of time is warped. Every second takes a minute, every minute takes an hour.
Not only that, but people will use this warped wait time to judge their entire customer experience. Why? It’s all down to a psychological principle called the Peak-end Rule.
The science behind an unforgettable customer experience
The Peak-end Rule says that people judge an experience based on how they felt at its peak and its end, not the average of every moment of the experience. And that’s true whether the experience was good or bad.
For brands, this means customers will remember their whole experience based on only two moments — the best (or worst) part of their experience, and the end.
Wait times are critical to a good experience — here’s how Uber applies psychology to perfect their customer experience
Because wait times are the key to a great customer experience, Uber has spent countless hours addressing this pain point.
In their research, Uber discovered three key principles dealing with how people perceive wait times: Idleness Aversion, Operational Transparency, and the Goal Gradient Effect.
Recent studies into psychology, happiness, and customer experience have uncovered a principle called “Idleness Aversion”. It states that people are happier when they are busier, even if they’re forced to be busy.
How to apply Idleness Aversion
To keep people busy, give them information to engage with — animation, gamification, and visuals are ideal.
In the example from Uber below, they use an animation that keeps you entertained and informed while you wait for your ride.
“When customers are separated from the people and the processes that create value for them, they come away feeling like less effort went into the service.
They appreciate the service less and then the value the service less as well.”
— Ryan Buell, Harvard Business School
Operational Transparency is the deliberate inclusion of windows into your company’s operations, so customers can see the effort going into their experience.
To keep people informed, make key information available, and help them understand where this information came from.
In the example from Uber Pool below, they provide information on how arrival times are calculated. It provides customers transparency but doesn’t overwhelm a non-technical audience with too many details.
The Goal Gradient effect states that people are more motivated by how much is left to reach their target, rather than how far they have come.
And as people get closer to a reward, they speed up their behavior to get to their goal faster.
How to apply the Goal Gradient Effect
Think of the Goal Gradient Effect as a virtual finish line. The closer customers get to winning, the more encouraged they become.
You’ll often see the Goal Gradient Effect in UX elements like progress bars and profile completion — users are encouraged to complete a task by achieving objectives.
Uber applies this principle by illustrating what’s happening behind the scenes while customers are waiting. They explain each step in the process, making customers feel they are making continuous progress toward their goal.
There’s no doubt that a large part of Uber’s revenue comes from optimizing their experience using science.When an experiment was run with Uber Pool that applied Idleness Aversion, Operational Transparency, and the Goal Gradient Effect, the results were impressive:
“The Express POOL team tested these ideas in an A/B experiment and observed an 11 percent reduction in the post-request cancellation rate.”
If you want to apply these principles to your brand, a testing mentality is critical. You have to be willing to test the application of the same principle in hundreds of different ways before discovering the best solution.
This experimentation mentality comes from the top down at Uber. As founder Travis Kalanick says:
“I wake up in the morning with a list of problems, and I go solve them.”
from Sidebar https://sidebar.io/out?url=https%3A%2F%2Fuxdesign.cc%2Fhow-uber-uses-psychology-to-perfect-their-customer-experience-d6c440285029
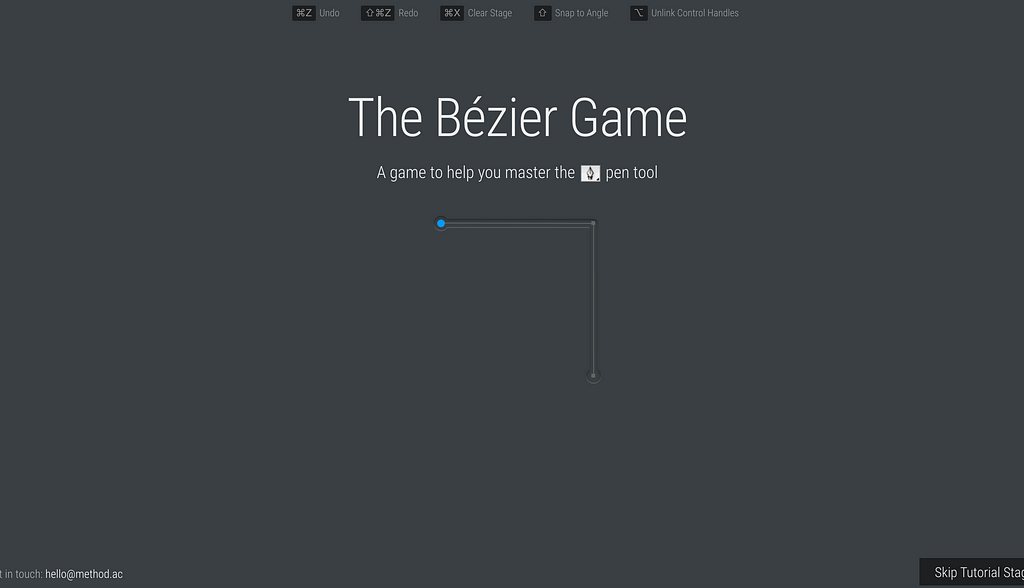
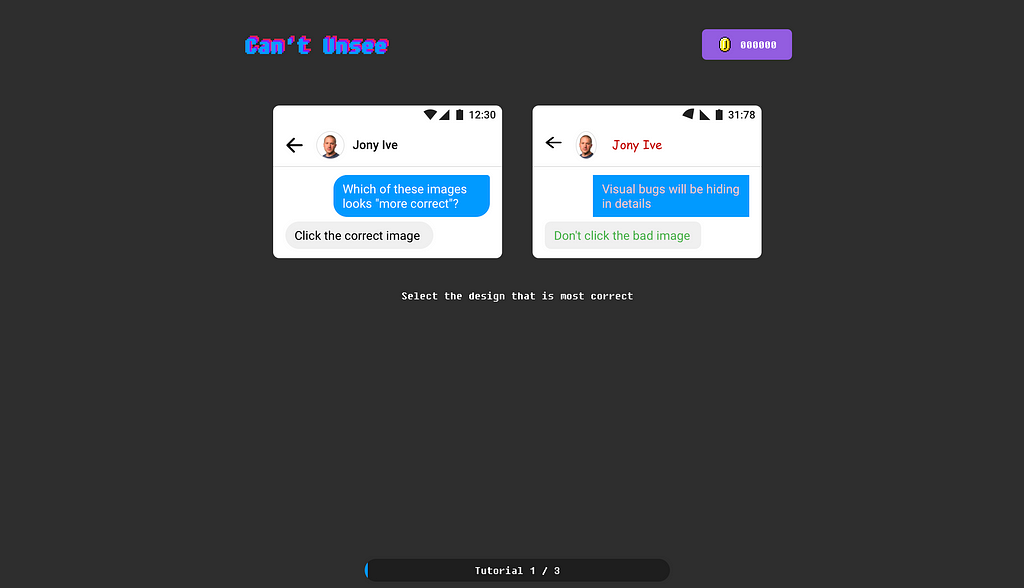
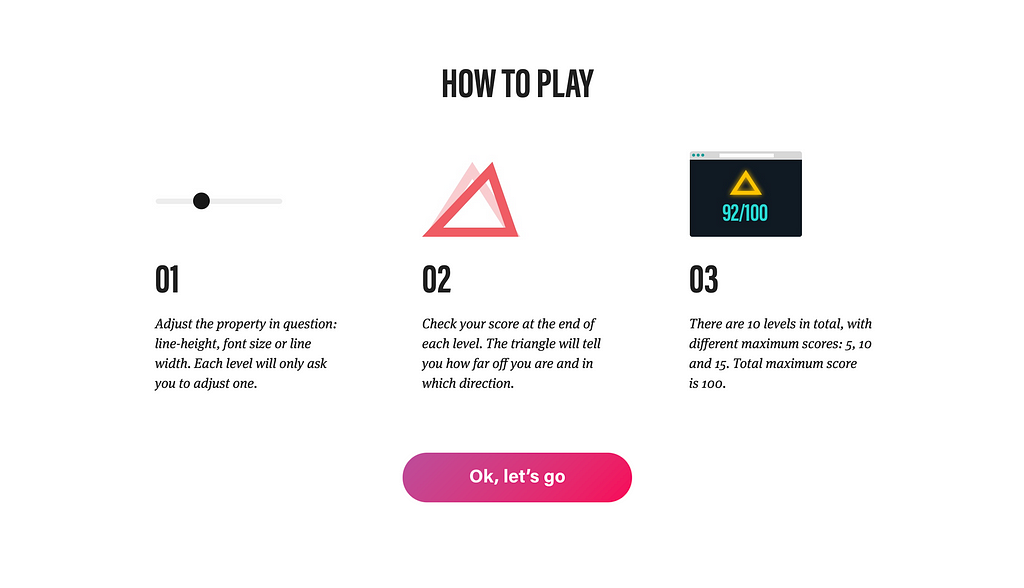
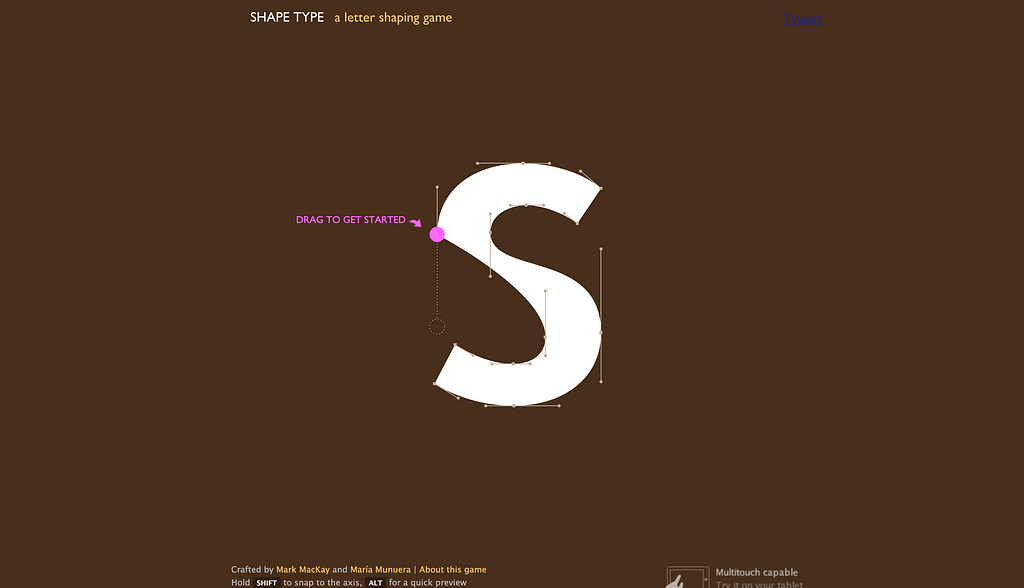
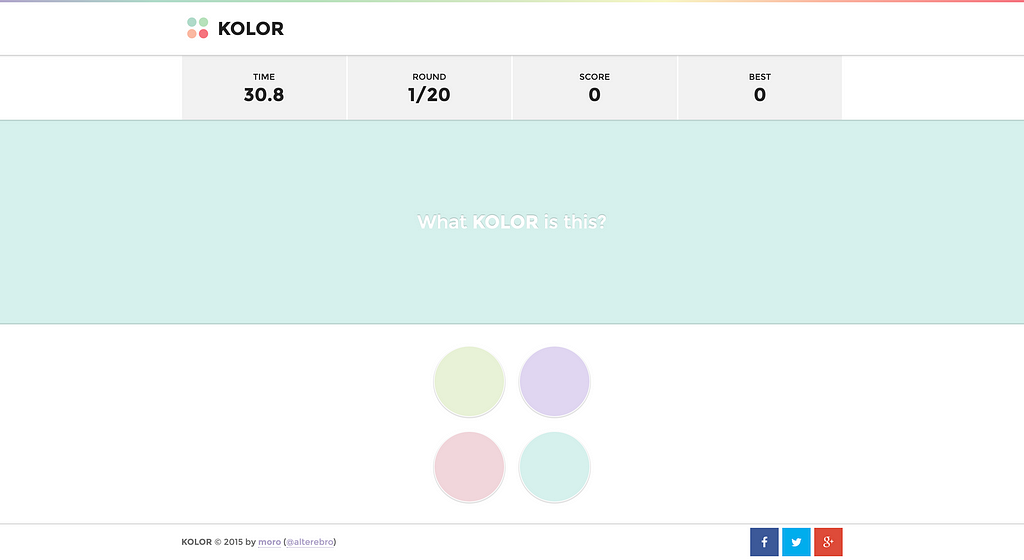
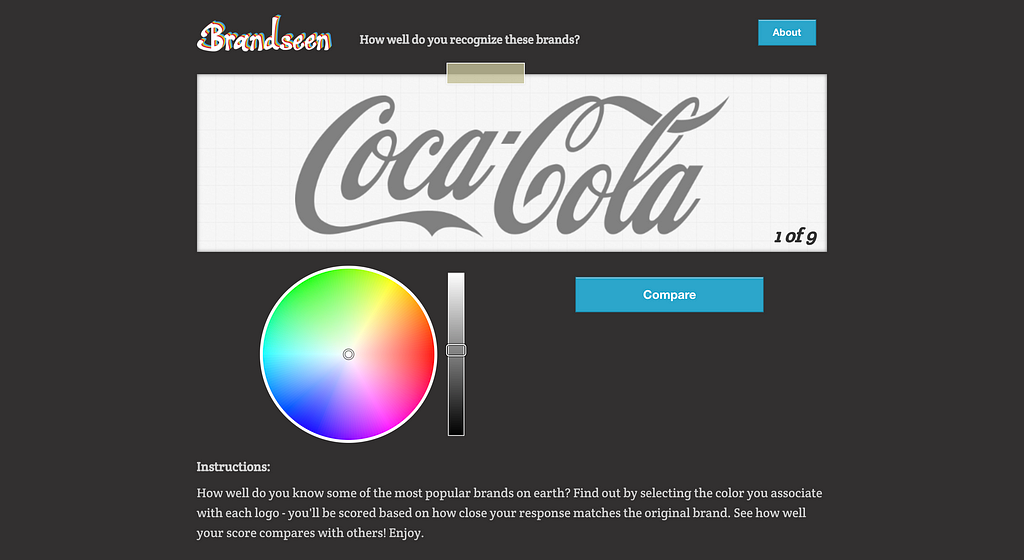
No matter how good you are in your skills, every once in a month, you still need to check whether you are still good enough or you need to open the tool and design things but hold on I got some other options to test skills in a more fun way.
Here are some of the games that UI designers can play to test their skills.
Recent developments in AI have transformed our view of the future, and from certain angles, it doesn’t look pretty. Are we facing total annihilation? Slavery and subjugation? Or could a manmade super-intelligence save us from ourselves?
You know, I remember the good old days when all you had to worry about at Halloween was how to stop a gang of sugar-crazed 8 year-olds throwing eggs at your house. Not any more. Here are 5 emerging technologies that are bound to give you the creeps:
1. Quantum Supremacy
Perhaps the biggest tech news of 2019 came last month when Google announced “by mistake” cough that they’d completed a “10,000 year” calculation on their Sycamore quantum chip in 200 seconds. If the term “Supremacy” wasn’t sinister enough, the claim that this could render conventional encryption methods obsolete in a decade or so should give you pause for thought.
this could render conventional encryption methods obsolete
Just think about it for a second: that’s your bank account, all your passwords, biometric passport information, social security, cloud storage and yes, even your MTX tokens open and available to anyone with a working knowledge of Bose-Einstein condensates and a superconductor lab in their basement. Or not.
2. Killer Robots
To my mind, whoever dreamed up fast-moving zombies is already too depraved for words, but at least your average flesh-muncher can be “neutralised” with a simple shotgun to the face or — if you really have nothing else — a good smack with a blunt object. The Terminator, on the other hand (whichever one you like), a robot whose actual design brief includes the words “Killer” and “Unstoppable” in the same sentence, fills me with the kind of dread normally reserved for episodes of Meet the Kardashians.
autonomous drone swarms…detect their target with facial recognition and kill on sight on the basis of…social media profile
We already know for certain that Lethal Autonomous Weapons (LAWs for short…) are in active development in at least 5 countries. The real concern, though, is probably the multinationals who, frankly, will sell to anyone. With help from household names like Amazon and Microsoft, these lovely people have already built “demonstration” models of everything from Unmanned Combat Aerial Systems (read “Killer Drones”) and Security Guard Robots (gun-turrets on steroids) to Unmanned Nuclear Torpedoes. If that’s not enough for you, try autonomous drone swarms which detect their target with facial recognition and kill on sight on the basis of… wait for it…“demographic” or “social media profile”.
Until recently, your common-or-garden killer robot was more likely to hurt you by accidentally falling on top of you than through any kind of goal-directed action, but all that’s about to change. Take Boston Dynamics, for example: the DARPA funded, Japanese owned spin-out from MIT whose humanoid Atlascan do parkour, and whose dancing quadruped SpotMinilooks cute until you imagine it chasing you with a taser bolted to its back.
The big issue here is the definition of “Autonomous”. At the moment, most real world systems operate with “Human in the Loop”, meaning that even if it’s capable of handling its own, say, target selection, a human retains direct control. “Human on the Loop” systems however, allow the machine to operate autonomously, under human “supervision” (whatever that means). Ultimately, more autonomy tends towards robots deciding for themselves to kill humans. Does anyone actually think this is a good idea?!
3. The Great Brain Robbery
If the furore around Cambridge Analytica’s involvement in the 2016 US Presidential election is anything to go by, the world is gradually waking up to the idea that AI can be, and is being used to control us. The evidence is that it works, not just by serving up more relevant ads, or allowing content creators to target very specific groups, but even by changing the way we see ourselves.
Careful you may be, but Google, Facebook and the rest probably still have gigabytes of information on you, and are certainly training algorithms on all kinds of stuff to try to predict and influence your behavior. Viewed like this, the internet looks less like an “information superhighway” and more like a swamp full of leeches, swollen with the lifeblood of your personal data (happy Halloween!).
4. Big Brother
I don’t know about you, but I’m also freaking out about Palantir, the CIA funded “pre-crime” company whose tasks include tracking, among other kinds of people, immigrants; not to mention the recent memo by the US Attorney General which advocates “disrupting” so-called “challenging individuals” before they’ve committed any crime. Call me paranoid, but I’ve seen Minority Report (a lot) and if I remember right, it didn’t work out well… for anyone!
This technology is also being used to target “subversive” people and organisations. You know, whistleblowers and stuff. But maybe it’s not so bad. I mean, Social and Behavior Change Communication sounds quite benign, right? Their video has some fun sounding music and the kind of clunky 2D animation you expect from… well no-one, actually… but they say they only do things “for the better”… What could possibly go wrong? I mean, the people in charge, they all just want the best for us, right? They wouldn’t misuse the power to make people do things they wouldn’t normally do, or arrest them before they’ve done anything illegal, right guys? Guys…?
5. The Ghost in the Machine
At the risk of wheeling out old clichés about “Our New Silicon Overlords”, WHAT IF AI TAKES OVER THE WORLD?!
I’ll keep it short.
Yes, there’s a chance we might all be enslaved, Matrix style, by unfeeling, energy-addicted robots. Even Stephen Hawking thought so. There’s also the set of so-called “Control Problems” like Perverse Instantiation where an AI, given some benign-sounding objective like “maximise human happiness”, might decide to implement it in a way that is anything but benign – by paralysing everyone and injecting heroin into their spines, perhaps. That, I agree, is terrifying.
But really, what are we talking about? First, the notion of a “control problem” is nonsense: Surely, any kind of intelligence that’s superior to ours won’t follow any objective we set it, or submit to being “switched off” any more than you would do what your dog tells you… oh no wait, we already do that.
Surely, any kind of intelligence that’s superior to ours won’t follow any objective we set it
Second, are we really so sure that our “dog-eat-dog” competitive approach to things is actually all there is? Do we need to dominate each other? Isn’t it the case that “super” intelligence means something better? Kinder? More cooperative? And isn’t it more likely that the smarter the machines become, the more irrelevant we’ll be to them? Sort of like ants are to us? I mean, I’m not sure I fancy getting a kettle of boiling water poured on me when I’m in the way but, you know… statistically I’ll probably avoid that, right?
Lastly, hasn’t anyone read Hobbes’ Leviathan? If a perfect ruler could be created, we should cast off our selfish individuality and surrender ourselves to the absolute sovereign authority of… ok, I’ll stop.
So, Are We Doomed or What?
Yes. No! Maybe. There are a lot of really scary things about AI but you know what the common factor is in all of them? People. We don’t know what a fully autonomous, super intelligent machine would look like, but my hunch is it would be better and kinder than us. What really makes my skin crawl are the unfeeling, energy-addicted robots who are currently running the show. In their hands, even the meagre sketches of intelligence that we currently have are enough to give you nightmares.
Herewith I declare that I am the sole author of the submitted Master’s thesis entitled: “Design Guidelines for Mobile Augmented Reality Reconstruction”.
from Google Alert https://www.google.com/url?rct=j&sa=t&url=https://cartographymaster.eu/wp-content/theses/2019_Yuan_Thesis.pdf&ct=ga&cd=CAIyGmJhYjllOWZjNzViYWJhMTA6Y29tOmVuOlVT&usg=AFQjCNGD1eFKLIu153MBnV4YW_xHKxTY6Q
Payment logic is central to any product that deals with money. After all, a well-designed payment architecture, if properly tested, saves tons of time in the future.
But it may take too long to master the top level of working with popular payment gateways.
To help you out, I wrote this guide on designing payment logic on Stripe. It includes use cases, project examples, and a bit of theory with code samples.
This guide is mostly for QA engineers as it helps to understand how to test payment logic based on Stripe. But don’t come off, PMs and developers. We have lots of interesting details for you too.
How Stripe Works
Let’s start with the basics and review the Stripe payment scheme.
Payment scheme for Stripe
This scheme works for users that buy content on websites or through mobile apps. Visitors don’t need to register and add link credit cards to their profiles – Stripe allows paying for the content seamlessly.
All they need to do is enter credit card details, and the magic happens:
Credentials are sent to Stripe.
Stripe tokenizes the data and returns a token to the back-end.
Back-end creates a charge.
The data is sent to Stripe again, and it shares the details with payment systems.
Payment systems respond to Stripe and state whether everything alright. Or report about issues.
Stripe responds to the server about the state of the transaction.
If everything goes smoothly, the user gets content. If not, an error message.
Besides, there are two necessary conditions to use Stripe:
you have a bank account
you are a resident of one of the 25 supported countries
Connecting a card to Stripe
Linking your product user with Stripe customer goes on the server-side. And it looks like this:
Credit card credentials go to Stripe (from app or website);
Stripe returns a token, then it goes to the back-end;
Back-end sends it back to Stripe;
Stripe checks whether the customer exists (if yes, the card is added, not – it creates a new customer and adds the card).
The first card added is the default payment method. Stripe will use it to make the transaction.
Connecting with a Stripe account
If you’re building an on-demand app like Uber and want users to get paid in it (like Uber drivers), ask them to create an account first.
There are three types of Stripe accounts:
Standard. An already existing account with the required credentials. Registered by the user, validated by Stripe and a bank.
Express. Enables easy on-boarding: you create an account on your own, and the user fills it with details. Works within the US.
Custom. Comes with the highest level of flexibility and allows you to modify multiple parameters. In turn, the platform is responsible for every interaction with users.
Stripe Core Features
Still on the subject of how Stripe works, I suggest taking a look at its features.
Charges
Stripe makes two kinds of charges – direct and destination.
Direct charge
Let’s get back to the Uber model. The platform charges a certain amount from riders, and that money goes directly to the linked accounts, to drivers. Direct charge implies that drivers pay all the fees. Plus, Uber also charges a fixed percentage.
Destination charge
In this case, the platform pays all the fees, and you get the net worth. First, the amount goes to the Stripe account of your platform, and then there’s an automatic transfer to the partner (drivers).
Authorize and capture
Stripe supports two-step payments that enable users to authorize a charge first and capture it later. Card issuers guarantee that auth payments and the required amount gets frozen on the customer’s card.
If the charge isn’t captured for this period, authorization is canceled.
Here’s how it works in Uber: a rider sees an approximate cost of the trip while booking the ride. If they agree to it, this amount gets frozen on their cards until they finish their trip.
When they finish the ride, Uber calculates the final price and charges it from the card.
That’s the reason product owners choose Stripe for their P2P payment app development. As trust matters the most when it comes to peer-to-peer transactions.
Finally, here come another three Stripe features I’d like to mention.
Transfers. Transfers go from the platform account to suppliers. For instance, Uber drivers link Stripe accounts with their profiles to get the pay.
Subscriptions. This feature is quite flexible and enables users to set intervals, trial periods, and adjust the subscription to their needs.
Refunds. If buyers want to get their money back, Stripe users can easily issue a refund to the customers’ card.
Handling Stripe Objects
Next, we’re moving to the Stripe objects. And here come the code samples I’ve promised.
Source object
Here’s a checklist for the source object.
Key
Value
customer
customer’s stripe id
id
stripe_id of added card
last4
last 4 numbers of added card
brand
credit card company (Visa, AE)
exp_month, exp_year
expiration date of the card
The object keeps a payment method that helps to complete the charge. It’s also possible to link the source object with users. This allows them to store all the payment methods there.
When testing, it’s crucial to make sure a payment method corresponds with the returned value. Check last4 and exp_month/year for this.
If the source object is linked with a customer and you want to make sure it belongs to the right person, check the customer id. Here’s a JSON of the object:
The transfer object keeps information related to the transfer from the platform balance to other accounts. Like payouts to platform’s partners – Uber drivers.
Mind that all the transactions should be loginized in the database. This way, during testing, you’ll see the transfer id. Go to Stripe and check the following:
amount – the sum paid to a payee
destination – Stripe account of the user who gets the payment
reversed – if you need to cancel a transaction, the key acts as an indicator. It shows a false value if the transaction succeeded. True – if reversed
reversals – stores a list of objects in case any part of the transfer was reversed
payment amount in cents (pay attention to +/- signs)
available_on
date when money will be available for a payee
fee
amount of Stripe fee
fee_details
list of fee objects
net
amount of net income/expenditure
status
current status of operation
The object stores data about any changes to the application balance. You don’t actually need to test this object. It’s rather for understanding where the fees come from.
amount – payment amount in cents
available_on – the money sent to partners will be available for them in time, and this key tells when exactly
fee – amount of the Stripe fee
fee_details – list of fee objects with a description why the fee was charged
net – amount of net income
status – the status of operation success
type – type of the object (charge, refund, transfer)
Finally, we move to use cases. So let’s find out how we build the business logic using Stripe.
Subscriptions
Case: Users pay $5/month for getting access to the content. Its author earns 80% of the overall cost. Customers have five trial days.
How to make it work:
Create the subscription plan in Stripe, specify the cost, % of app fee, and the interval.
Integrate webhooks for the server to understand when someone subscribes and when they’re charged.
Integrate emails to send users invoices/receipts.
When a user buys the subscription, Stripe counts down five days from that moment and then makes the charge.
The author gets money, the platform gets its fee.
Fee: 2.9% + 30 cents
Content purchase
Case: Users purchase content on a website or mobile application.
How to make it work:
The customer tokenizes a card.
Backend makes the Charge.
If the Charge is successful, the platform’s business logic allows the customer to get the content.
Fees: 2.9% from the charge + 30 cents.
On-demand platform (Uber)
Case: The client pays for the ride, the platform charges 20%, the driver gets 80%.
Preconditions:
Driver linked an account
User added a card
In this case, you need to create transfers on your own after the rider completes the payment.
First, authorize the payment when they book the ride and capture it when the ride’s complete.
Next, create a transfer for the driver – 80% of the total sum. Pay the Stripe fee, and the rest will be the net income.
And the fee is: 2.9% + 30 cents
On-demand platform #2
Uber-like apps are perfect for showing how Stripe works. So here goes another use case.
Case: Customer pays for the service, the platform charges 20%, the driver gets 80%. Plus, the driver can pay $5 for the priority booking right.
Works if the driver linked their account, and the rider added a credit card.
Variant #1. You charge $5 from the driver (in case of the priority option), authorize payment for the customer, do the capture when the ride ends, make a transfer for the driver. And keep the rest. In this case, you pay 2.9% fee + 30 cent for each charge.
Variant #2. You can skip fees by creating the inner monetization on your platform. When you get money from the customer, you calculate the driver’s share and transfer those funds to the inner balance.
Cashflow
In conclusion
As you see, the implementation of payment logic and its testing are not as hard as they seem. All you need to do is handle the Stripe objects in the right way. And figure out how to use Stripe on your platform.
I hope this guide will come handy when you get started with designing Stripe-based payment logic and its testing.
from freeCodeCamp https://www.freecodecamp.org/news/how-to-design-payment-logic-on-stripe-and-apply-it/
This article is for those who familiar with the Agile work environment and UX research.
If you are new to design terms like ‘design discovery’ or ‘UX research’, I recommend visiting this article as well.
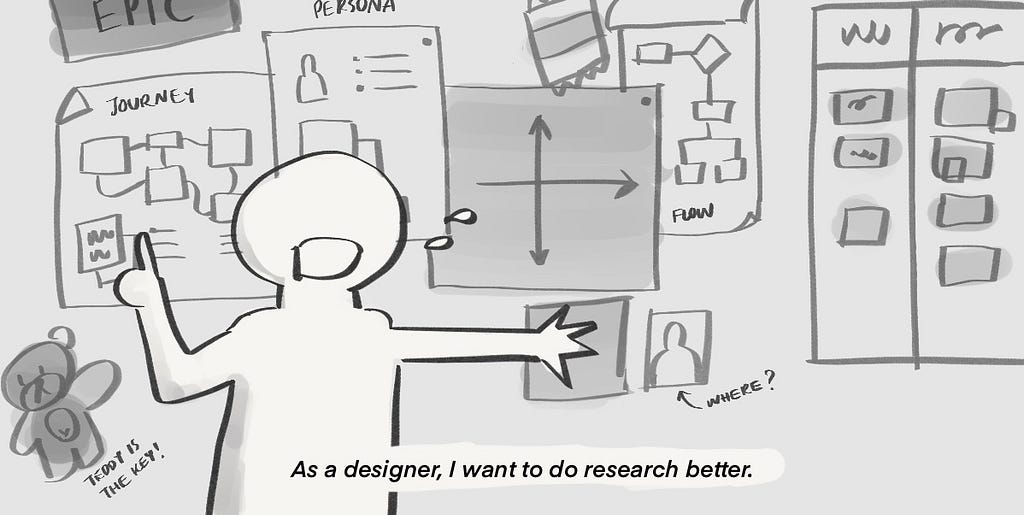
Most designers I met feel the struggle within the agile working team because they can not do research in their working environment. Research is part of the discovery and an important factor to design a great product or service. Without research, the designer has to guess what is the best experience or get the stakeholder requirements which mostly — not leads to a great product for the user or the business.
When designers work in an Agile environment, we are expected to deliver the UI so the developer can continue their work. We became a bottleneck if we spend too much time on research.
Maximize Design Research
Business wants to make money and money comes from customers. Customers pay for things that make their life better. Simple logic yet hard to accomplish. The designer makes the product meet customer needs/context/usability. This is why we need to Discover what kind of value proposition we can do and how do we do it.
Research is one tool designer use to uncover the unknown (eg. customer insights, usability check, etc.). Here are tactics to maximize research.
1. Manage to start research as upfront as possible.
Be enthusiastic with little time you have before the upcoming iteration.
If the project is a fresh start, at the beginning of the project, your devs can not start to code on their first day. They need time to set up how they work as well. Take this period seriously and talk to your BA, PM, PO what is it you think should be validated and why it might impact the design.
BA and PO are the keys to help you get more time to research. BA and PO plan the upcoming story. The story should start with something generic and focus on the beginning of the user journey. For example, login, you don’t need much research from that because you already have the best practice all around the internet.
Make sure the first research you pick helps you shaping the overall high-level user journey AND the upcoming research-priority story. I will cover what is research-priority in topic No. 4
2. Reframe your research deadline: Designers are NOT doing research base on two weeks iteration.
If your team is doing scrum base on 2 weeks iteration, the only thing that bases on 2 weeks deadline is UI for a specific story. But designers don’t design UI base on story but entire experience flow. So you don’t need to limit your plan for your discovery activity base on that timeline.
After you have a high-level journey and a rough deadline of iteration story, now you start a research plan for THE WHOLE FLOW of that feature. Your first research base on validating the flow as the first priority, then specific interaction for the upcoming UI deadline.
If your first story is basic login flow= you can skip user research and do desk research for best practice because you don’t want to reinvent the wheel! Now you can cut it out from your user research list and do quick desk research which saves more time and resources. This research deadline follows the iteration deadline because the unknow is uncovered enough from desk research so you can start UI design. After you finished the UI design, you should do a usability test but with your colleague sitting next to you.
If the second story is “As a user, I want to see notification of xxx.” and you not sure what is the best moment to send user notification or should it be something else like email notification? You are not sure about the flow at all. Now you have to do research to uncover ‘what is the best way to do notification?’ This deadline should NOT follow the iteration deadline because when you research to uncover, it might end up a different form of solution which effects story prioritization.
If you want to have time to uncover this, it’s your job to notice this more than 1 iteration ahead. It the unknow a lot more eg. ‘Does notification brings value to customer’ you might need more iteration to finished it.
But if the deadline is coming near you have to deliver your best guess (‘best guess’ is our nightmare I know!) and do the learning from what you delivered. Propose a solution after learning to the decision-maker with strong why. Add the backlog with your stakeholder agreement. Don’t consider the end of an iteration is the end of your research. Remember that Agile shape their work this way to help us learn faster!
3. Research goal over research method.
DON’T EVER start research with methodology. Always start with the research goal then decide how to get the result.
Bad example start with research method: We are doing a usability test which prototype is easier to find feature X (you might end up produce a lot of prototype=waste of time)
Take a step back, Reframe Goal: Where is the best place for feature X to be discovered for a one-time user?
Now you can think of a much better way to validate this goal. It could be a quick poll on which menu tab do you think the feature X live in and you don’t waste much time.
I read an interesting explanation from Matthew Godfrey which illustrate how different purpose of the research impacts our research scope.
4. Research on the biggest impact & least time-consuming.
You can’t do research to cover 100% unknown of the flow but you can research on the most critical flow to cover 80% unknown.
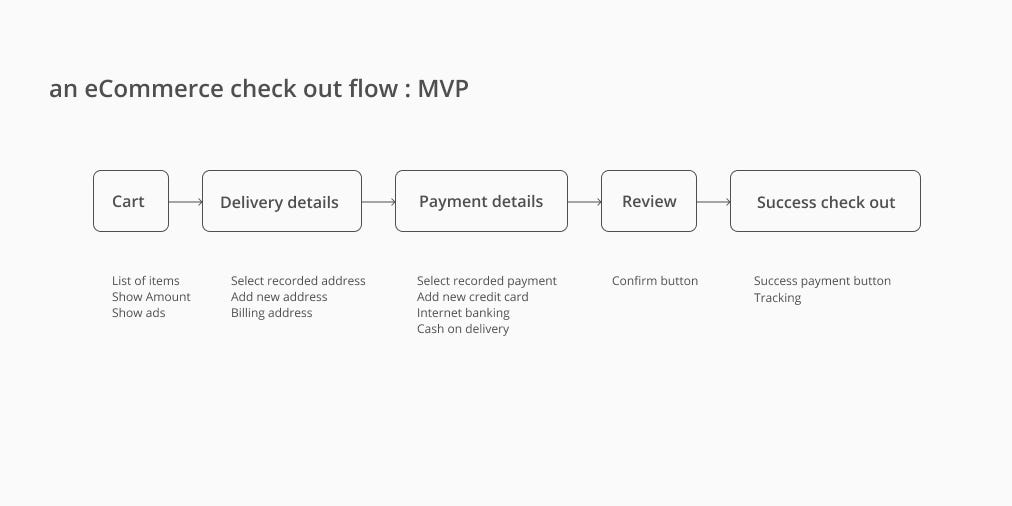
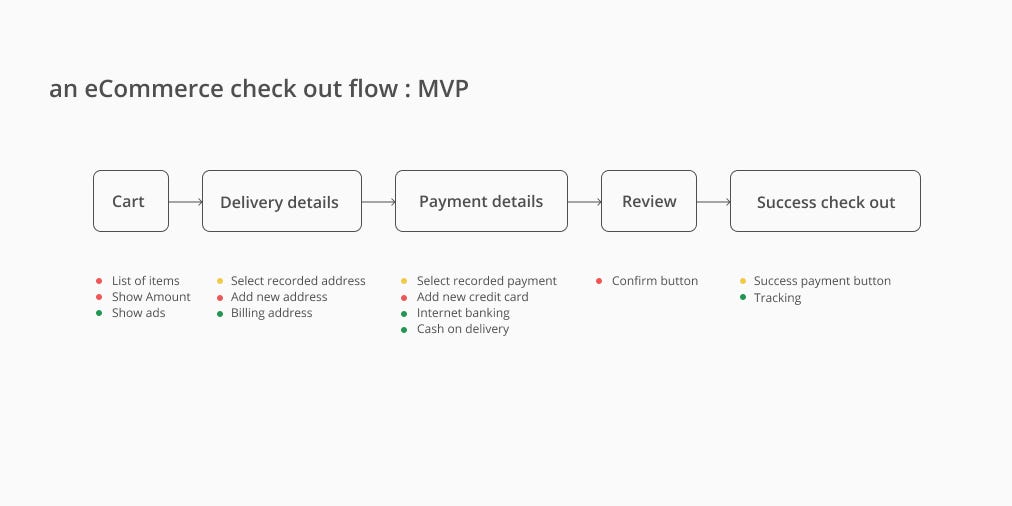
List out all the unknown into research bits — You have a lot of things in your design you which you can validate. Mapping out your design and list all the flow and feature. For example, you have a check-out flow of an eCommerce website. You listed out the Flow then have a look what are the feature involved.
Example flow and list of features within it. You should list as much as possible.
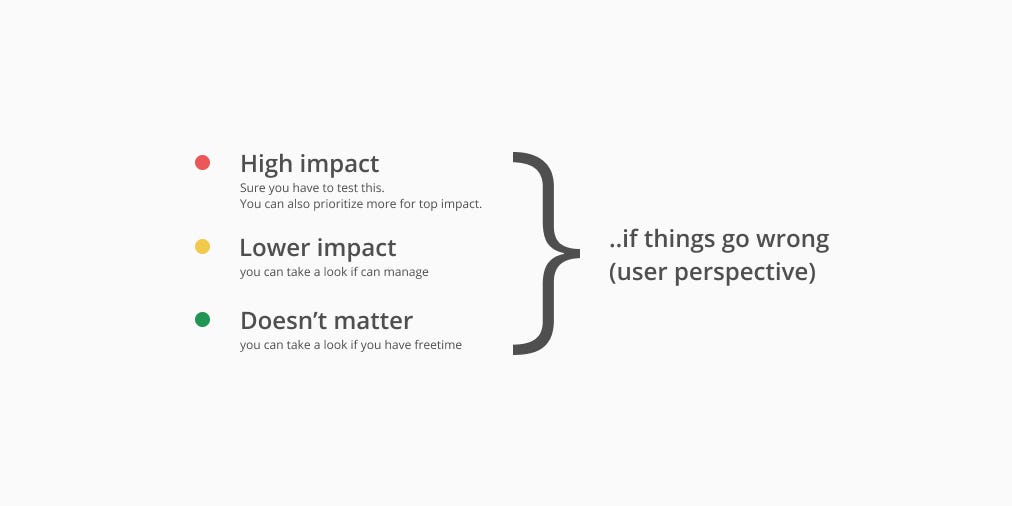
Prioritize list item starting with 2 criteria — “If this was gone wrong, how big is the impact?” and “time spends to do research”. I recommend you to do the “impact” first then “time” because in “time” you have to think of how to do the research to estimate time.
Then… Score the impact if things go wrong. You can score with number or something else.Let’s say you think of each feature impact this way. You might say Cash on delivery and Internet banking is not an important impact because this flow has been used and went well. But you think a list of items has a high impact because if users select quantity wrong because of bad UX it could be a big consequence.
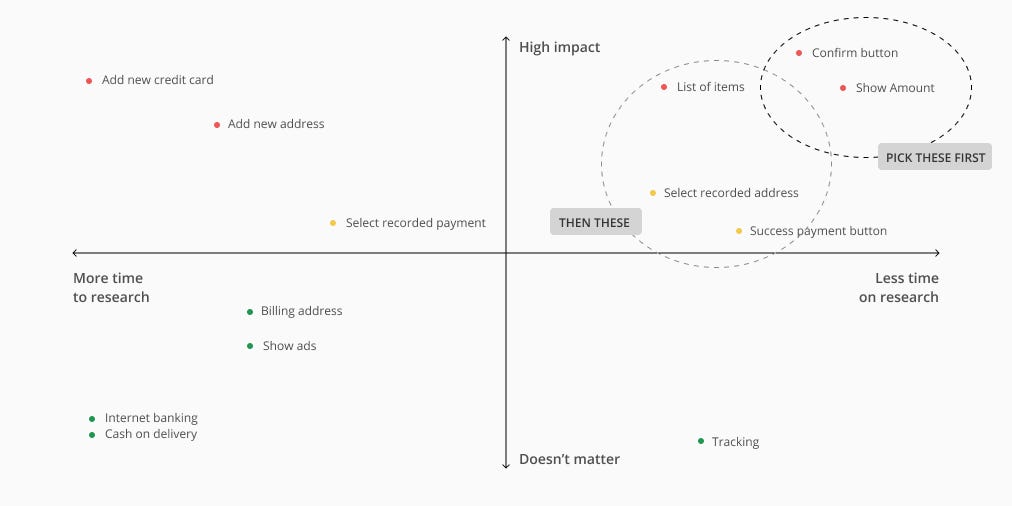
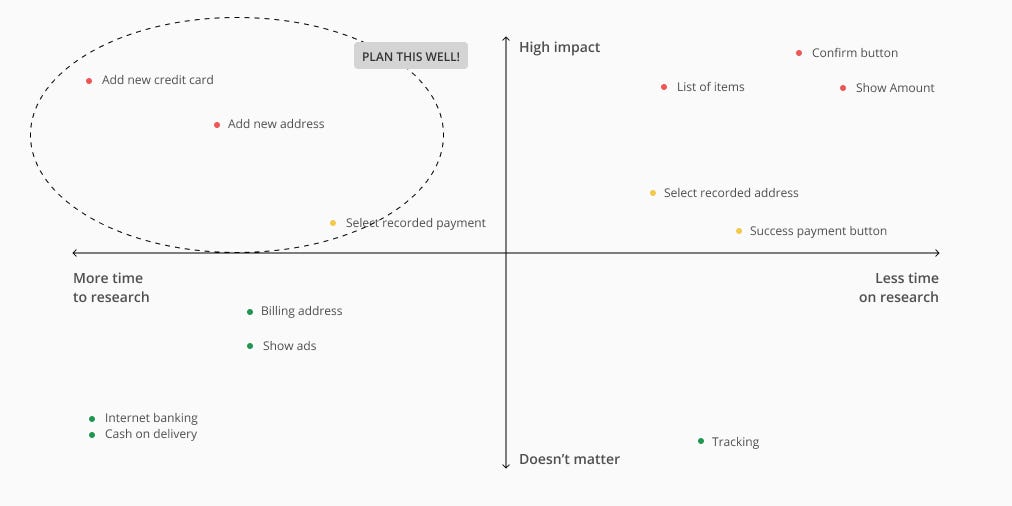
Now add the second criteria — time. You will find it easier to spot which area makes sense to pick up first. So if you have 1 day to do research, pick up the top right corner!
But you must not forget the top left corner. These are important but consume time. You have to plan ahead and use the tactics I mentioned earlier to maximize your time.
5. If you are not solo UX in the team, have a Research leader.
When everyone has their own UI to make we usually work like we are not the team. From my experience, we are going slower if we don’t have research support for our UI confidence.
Yes, the research leader should give some defined UI work to your teammate and focus on unknown discovery. If it’s waterfall world, Having one less UI maker but one more Design researcher is way more beneficial to the team. We know for the fact that having uncovered flow ready we can deliver the UI work so much faster.
The concept is to have someone own responsibility for design research and have capacity enough to cover important hypothesizes. You have to set up this with your team. Determine how much capacity should this person use between research and UI delivery.
Research leader responsibility
Keep harvesting the unknown list from the design team. You can use a workshop or go to each UX and ask what flow/interaction they feel unconfident.
Put the list in criteria and plan the research. (see ‘4.research on biggest impact’ above)
Do effective research. You have more time doesn’t mean you can do a long interview. Always do lean.
Make sure you balance your research work with UI work since you still have to feed the pipeline yourself.
The teammate still has to research. But they don’t have to invest as much time and energy to manage the entire process. They have to involve because at the end, we all deliver UI for the devs. So make sure your teammate involve during their UI research so they can go back and continue UI development.
6. You might not need a real end-user to test your design.
Some validation doesn’t need a real end-user to be your respondent. You have to know when do we need real users and when you aren’t.
You need to recruit real end-user when…
It needs a specific end-user context to understand the research artifacts (eg. customer service portal)
The goal is to empathize with the user context and needs. (eg. How sick Elderly in homecare in Bangkok value x,y,z feature?)
For example, you are designing a B2B service website for big corporate HR. You would like to validate…
“What kind of pricing content leads to more conversion rates?” >> you have to validate with HR or someone with a similar context. you can not validate with the first jobber who works as a copywriter because he/she won’t have a big corporate HR mindset about what they want to see in pricing content.
“Does the copy confusing between button X and Y together on this page?” >> This you can ask your teammate next to you. Don’t need an HR background to validate unless the button naming is something HR-related.
BUT, If you know the end user’s goal/motivation/context is very clear from previous research >> you can test with anyone similar or neutral background. Give the respondent the context background (role play) before research. (the result is not as precise as end-user themselves but you can use in an emergency)
Key take away
Plan to do research upfront. You are the one responsible to know the iteration plan ahead to allocate research time.
Design research does not necessarily base on the iteration deadline. UI does.
Don’t ever plan the research base on methodology. Research can be any form base on research goals.
Prioritize what to research with 2 criteria — impact if fail and time spends to research. Pick the important less time. Also, plan for important long time!
Have a research leader if you have more than one designer in a team.
You might not need to spend time to recruit a real user. Check what context you would like to research.
Hi! I’m Kuppy, an Experience designer from Thailand. This is my first article and I hope you find it’s helpful 🙂 Please feel free to comment/discuss/connect with me. My twitter | My Linkedin
MediView XR has raised $4.5 million to equip surgeons with augmented reality imagery that effectively gives them 3D X-ray-like vision. With Microsoft …
from Google Alert https://www.google.com/url?rct=j&sa=t&url=https://venturebeat.com/2019/10/21/mediview-xr-raises-4-5-million-to-use-ar-to-give-surgeons-x-ray-vision/&ct=ga&cd=CAIyGmJhYjllOWZjNzViYWJhMTA6Y29tOmVuOlVT&usg=AFQjCNGj51jCoBtfqAa_wBQuakukHiBY8Q
On November 15, 2019, AdWords API, Google Ads API, and Google Ads scripts will start returning null ID criteria for YouTube channels and videos that have been deleted, due to changes in our data retention policy. The criteria itself remains for a given ad group, but referencing the video ID or channel ID for that criteria will return null.
In the AdWords API v201809, null values are returned as two dashes (–) in reporting.
In the Google Ads API, NULL values are returned as NULL values.
In Google Ads Scripts, null values are returned as null JavaScript values.
Please update your code where it uses these fields:
Neural Networks are like the workhorses of Deep learning. With enough data and computational power, they can be used to solve most of the problems in deep learning. It is very easy to use a Python or R library to create a neural network and train it on any dataset and get a great accuracy.
We can treat neural networks as just some black box and use them without any difficulty. But even though it seems very easy to go that way, it’s much more exciting to learn what lies behind these algorithms and how they work.
In this article we will get into some of the details of building a neural network. I am going to use Python to write code for the network. I will also use Python’s numpy library to perform numerical computations. I will try to avoid some complicated mathematical details, but I will refer to some brilliant resources in the end if you want to know more about that.
So let’s get started.
Idea
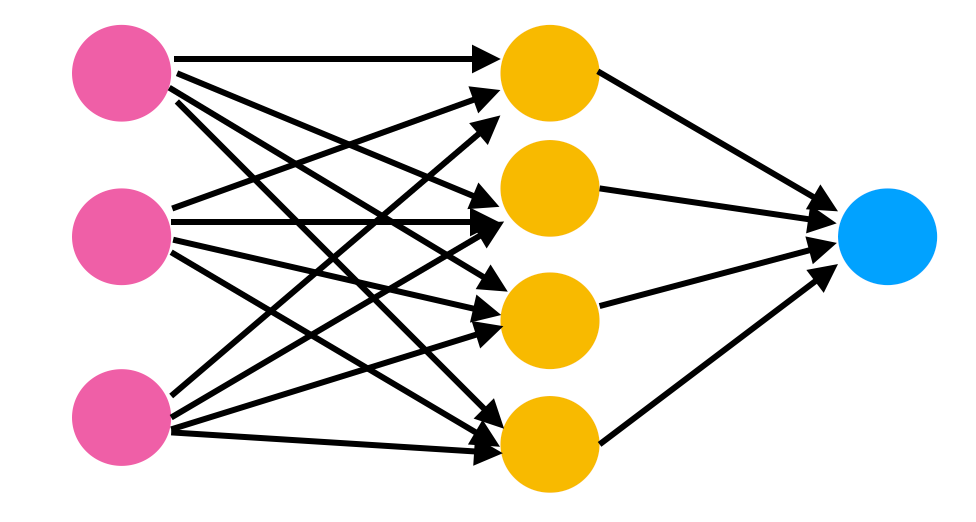
Before we start writing code for our Neural Network, let’s just wait and understand what exactly is a Neural Network.
In the image above you can see a very casual diagram of a neural network. It has some colored circles connected to each other with arrows pointing to a particular direction. These colored circles are sometimes referred to as neurons.
These neurons are nothing but mathematical functions which, when given some input, generate an output. The output of neurons depends on the input and the parameters of the neurons. We can update these parameters to get a desired value out of the network.
Each of these neurons are defined using sigmoid function. A sigmoid function gives an output between zero to one for every input it gets. These sigmoid units are connected to each other to form a neural network.
By connection here we mean that the output of one layer of sigmoid units is given as input to each sigmoid unit of the next layer. In this way our neural network produces an output for any given input. The process continues until we have reached the final layer. The final layer generates its output.
This process of a neural network generating an output for a given input is Forward Propagation. Output of final layer is also called the prediction of the neural network. Later in this article we will discuss how we evaluate the predictions. These evaluations can be used to tell whether our neural network needs improvement or not.
Right after the final layer generates its output, we calculate the cost function. The cost function computes how far our neural network is from making its desired predictions. The value of the cost function shows the difference between the predicted value and the truth value.
Our objective here is to minimize the value of the cost function. The process of minimization of the cost function requires an algorithm which can update the values of the parameters in the network in such a way that the cost function achieves its minimum value.
Algorithms such as gradient descent and stochastic gradient descent are used to update the parameters of the neural network. These algorithms update the values of weights and biases of each layer in the network depending on how it will affect the minimization of cost function. The effect on the minimization of the cost function with respect to each of the weights and biases of each of the input neurons in the network is computed by backpropagation.
Code
So, we now know the main ideas behind the neural networks. Let us start implementing these ideas into code. We will start by importing all the required libraries.
import numpy as np import matplotlib.pyplot as plt
As I mentioned we are not going to use any of the deep learning libraries. So, we will mostly use numpy for performing mathematical computations efficiently.
The first step in building our neural network will be to initialize the parameters. We need to initialize two parameters for each of the neurons in each layer: 1) Weight and 2) Bias.
These weights and biases are declared in vectorized form. That means that instead of initializing weights and biases for each individual neuron in every single layer, we will create a vector (or a matrix) for weights and another one for biases, for each layer.
These weights and bias vectors will be combined with the input to the layer. Then we will apply the sigmoid function over that combination and send that as the input to the next layer.
layer_dimsholds the dimensions of each layer. We will pass these dimensions of layers to the init_parmsfunction which will use them to initialize parameters. These parameters will be stored in a dictionary called params. So in the params dictionary params[‘W1’]will represent the weight matrix for layer 1.
def init_params(layer_dims): np.random.seed(3) params = {} L = len(layer_dims) for l in range(1, L): params['W'+str(l)] = np.random.randn(layer_dims[l], layer_dims[l-1])*0.01 params['b'+str(l)] = np.zeros((layer_dims[l], 1)) return params
Great! We have initialized the weights and biases and now we will define the sigmoid function. It will compute the value of the sigmoid function for any given value of Z and will also store this value as a cache. We will store cache values because we need them for implementing backpropagation. The Z here is the linear hypothesis.
Note that the sigmoid function falls under the class of activation functions in the neural network terminology. The job of an activation function is to shape the output of a neuron.
For example, the sigmoid function takes input with discrete values and gives a value which lies between zero and one. Its purpose is to convert the linear outputs to non-linear outputs. There are different types of activation functions that can be used for better performance but we will stick to sigmoid for the sake of simplicity.
# Z (linear hypothesis) - Z = W*X + b , # W - weight matrix, b- bias vector, X- Input def sigmoid(Z): A = 1/(1+np.exp(np.dot(-1, Z))) cache = (Z) return A, cache
Now, let’s start writing code for forward propagation. We have discussed earlier that forwardpropagation will take the values from the previous layer and give it as input to the next layer. The function below will take the training data and parameters as inputs and will generate output for one layer and then it will feed that output to the next layer and so on.
def forward_prop(X, params): A = X # input to first layer i.e. training data caches = [] L = len(params)//2 for l in range(1, L+1): A_prev = A # Linear Hypothesis Z = np.dot(params['W'+str(l)], A_prev) + params['b'+str(l)] # Storing the linear cache linear_cache = (A_prev, params['W'+str(l)], params['b'+str(l)]) # Applying sigmoid on linear hypothesis A, activation_cache = sigmoid(Z) # storing the both linear and activation cache cache = (linear_cache, activation_cache) caches.append(cache) return A, caches
A_prev is input to the first layer. We will loop through all the layers of the network and will compute the linear hypothesis. After that it will take the value of Z (linear hypothesis) and will give it to the sigmoid activation function. Cache values are stored along the way and are accumulated in caches. Finally, the function will return the value generated and the stored cache.
As the value of the cost function decreases, the performance of our model becomes better. The value of the cost function can be minimized by updating the values of the parameters of each of the layers in the neural network. Algorithms such as Gradient Descent are used to update these values in such a way that the cost function is minimized.
Gradient Descent updates the values with the help of some updating terms. These updating terms called gradients are calculated using the backpropagation. Gradient values are calculated for each neuron in the network and it represents the change in the final output with respect to the change in the parameters of that particular neuron.
def one_layer_backward(dA, cache): linear_cache, activation_cache = cache Z = activation_cache dZ = dA*sigmoid(Z)*(1-sigmoid(Z)) # The derivative of the sigmoid function A_prev, W, b = linear_cache m = A_prev.shape[1] dW = (1/m)*np.dot(dZ, A_prev.T) db = (1/m)*np.sum(dZ, axis=1, keepdims=True) dA_prev = np.dot(W.T, dZ) return dA_prev, dW, db
The code above runs the backpropagation step for one single layer. It calculates the gradient values for sigmoid units of one layer using the cache values we stored previously. In the activation cache we have stored the value of Z for that layer. Using this value we will calculate the dZ, which is the derivative of the cost function with respect to the linear output of the given neuron.
Once we have calculated all of that, we can calculate dW, db and dA_prev, which are the derivatives of cost function with respect the weights, biases and previous activation respectively. I have directly used the formulae in the code. If you are not familiar with calculus then it might seem too complicated at first. But for now think about it as any other math formula.
After that we will use this code to implement backpropagation for the entire neural network. The function backprop implements the code for that. Here, we have created a dictionary for mapping gradients to each layer. We will loop through the model in a backwards direction and compute the gradient.
def backprop(AL, Y, caches): grads = {} L = len(caches) m = AL.shape[1] Y = Y.reshape(AL.shape) dAL = -(np.divide(Y, AL) - np.divide(1-Y, 1-AL)) current_cache = caches[L-1] grads['dA'+str(L-1)], grads['dW'+str(L-1)], grads['db'+str(L-1)] = one_layer_backward(dAL, current_cache) for l in reversed(range(L-1)): current_cache = caches[l] dA_prev_temp, dW_temp, db_temp = one_layer_backward(grads["dA" + str(l+1)], current_cache) grads["dA" + str(l)] = dA_prev_temp grads["dW" + str(l + 1)] = dW_temp grads["db" + str(l + 1)] = db_temp return grads
Once, we have looped through all the layers and computed the gradients, we will store those values in the grads dictionary and return it.
Finally, using these gradient values we will update the parameters for each layer. The function update_parameters goes through all the layers and updates the parameters and returns them.
def update_parameters(parameters, grads, learning_rate): L = len(parameters) // 2 for l in range(L): parameters['W'+str(l+1)] = parameters['W'+str(l+1)] -learning_rate*grads['W'+str(l+1)] parameters['b'+str(l+1)] = parameters['b'+str(l+1)] - learning_rate*grads['b'+str(l+1)] return parameters
Finally, it’s time to put it all together. We will create a function called train for training our neural network.
def train(X, Y, layer_dims, epochs, lr): params = init_params(layer_dims) cost_history = [] for i in range(epochs): Y_hat, caches = forward_prop(X, params) cost = cost_function(Y_hat, Y) cost_history.append(cost) grads = backprop(Y_hat, Y, caches) params = update_parameters(params, grads, lr) return params, cost_history
This function will go through all the functions step by step for a given number of epochs. After finishing that, it will return the final updated parameters and the cost history. Cost history can be used to evaluate the performance of your network architecture.
Conclusion
If you are still reading this, Thanks! This article was a little complicated, so what I suggest you to do is to try playing around with the code. You might get some more insights out of it and maybe you might find some errors in the code too. If that is the case or if you have some questions or both, feel free to hit me up on twitter. I will do my best to help you.
Resources
from freeCodeCamp https://www.freecodecamp.org/news/building-a-neural-network-from-scratch/


